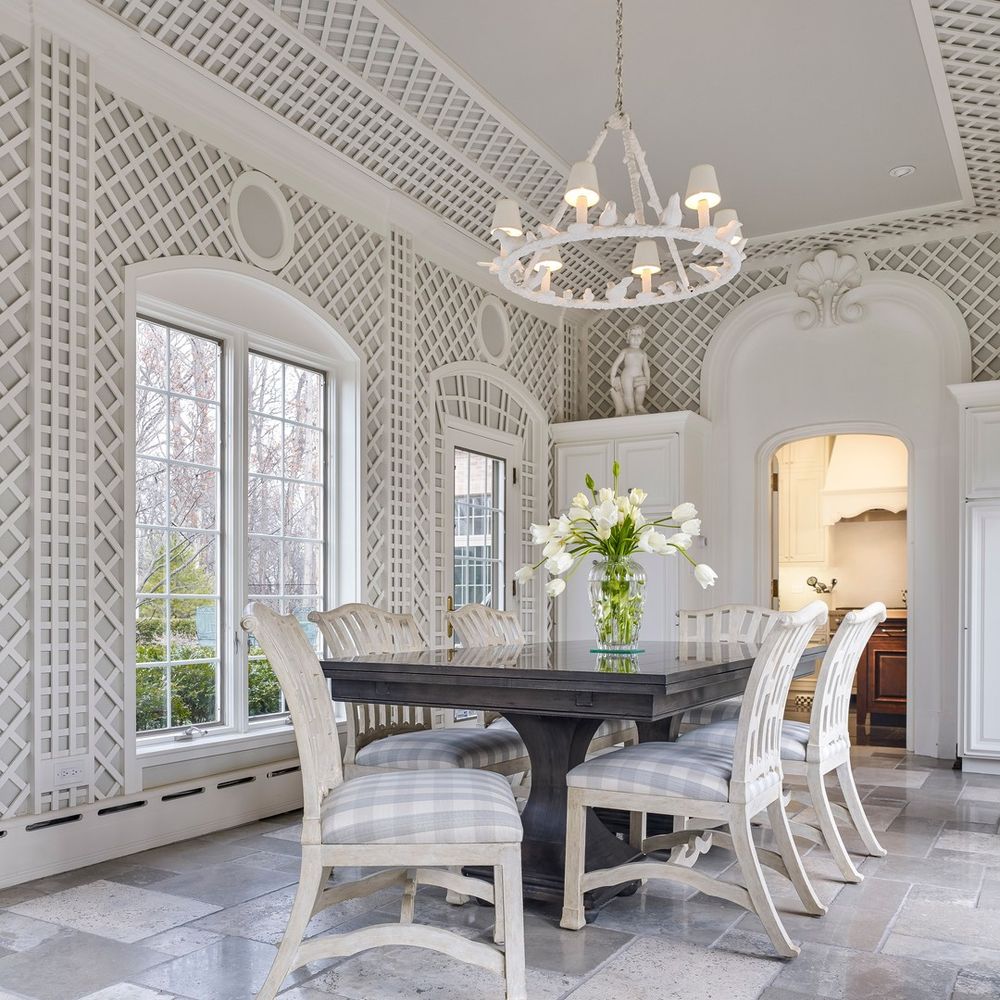
If you’ve been searching for a way to add elegance to your walls, look no further than lattice walls. These enchanting architectural elements have been gracing homes for centuries, dating back to ancient civilizations, and continue to captivate us with their timeless charm.
Today I’ll share interior design tips surrounding lattice walls, exploring their origins, purposes, and how you can incorporate them into your own abode. Get ready to be inspired to transform your walls into works of art with the mesmerizing beauty of lattice patterns.
Lattice walls, also known as lattice panels or lattice screens, are decorative structures made up of intersecting strips or slats arranged in a crisscross pattern. These panels are typically constructed from wood, metal, or plastic materials and are designed to enhance the aesthetic appeal of indoor and outdoor spaces.
Lattice walls can be used to serve both functional and decorative purposes. They are commonly employed as privacy screens, room dividers, or decorative accents that add texture, depth, and visual interest to walls, fences, or even freestanding structures. The intricate lattice pattern allows light and air to pass through while creating a captivating play of shadows and a sense of openness.
With their versatility and timeless charm, lattice walls have become a popular choice among homeowners seeking to infuse their living spaces with elegance and style.
Lattice Origins
The origins of the lattice can be traced back to ancient civilizations, where intricate patterns and decorative screens were incorporated into architectural designs.
While it is challenging to pinpoint a specific person or culture that can be credited with inventing lattice walls, various ancient civilizations across different regions, such as the Greeks, Egyptians, and Persians, employed lattice-like structures in their architectural styles.
For instance, in ancient Greece, lattice patterns were commonly used in the construction of trellises and pergolas, allowing plants to grow and providing shade. The Egyptians utilized intricate lattice screens in their palaces and temples, showcasing their mastery of craftsmanship.
Persian architecture also featured stunning lattice work known as “mashrabiya,” used to create privacy screens and allow ventilation in homes and buildings while maintaining a sense of beauty and intricacy.
Lattice vs Trellis
While both lattice and trellis are related to gardening and home decor, there are some key differences between the two:
A lattice is a structure consisting of intersecting strips or slats arranged in a crisscross pattern. It is typically used as a decorative panel or screen and can be made from various materials such as wood, metal, or plastic. Lattice panels are often used to enhance privacy and beauty or create a sense of enclosure. They can be installed on walls, fences, or freestanding structures. Lattice panels allow light and air to pass through while creating captivating patterns and shadows.
A trellis, on the other hand, is specifically designed to support climbing plants and provide them with a structure to grow upon. It is typically made of a wooden or metal framework with an open, grid-like pattern. Trellises are commonly used in gardens or outdoor spaces to support and train vines, roses, or other climbing plants. They can be freestanding or attached to walls or fences. Unlike lattice, trellises serve a primarily functional purpose by aiding plant growth and creating vertical green spaces.
Attaching Lattice to Drywall
Attaching lattice to drywall requires a few steps to ensure a secure and stable installation. Here’s a general guide on how to attach lattice to drywall:
- Prepare the materials: Gather the necessary materials, including the lattice panel, screws, a drill, wall anchors (if needed), a level, measuring tape, and a pencil.
- Determine the placement: Decide where you want to attach the lattice panel on the drywall. Use a measuring tape and a pencil to mark the desired location.
- Locate wall studs: To ensure a sturdy installation, it is best to attach the lattice panel to wall studs. Use a stud finder or tapping technique to locate and mark the position of the studs behind the drywall.
- Drill pilot holes: With the lattice panel in position, drill pilot holes through the lattice and into the wall studs. The size of the pilot holes should be slightly smaller than the diameter of the screws you are using.
- Attach the lattice panel: Align the pilot holes of the lattice panel with the marked positions on the drywall. Insert screws through the lattice and into the pilot holes, driving them gently until the lattice panel is securely attached to the wall studs. Be careful not to overtighten the screws, as it may damage the lattice or drywall.
- Check for levelness: Use a level to ensure that the lattice panel is straight and level. Adjust the positioning if necessary and tighten the screws accordingly.
- Finishing touches: If desired, you can use finishing nails or adhesive caulk to further secure the lattice to the drywall or to cover any visible screws or gaps.


I would love to speak to someone as to where I can purchase the more intricate lattice work. The larger Hardware stores seem to only carry the standard lattice panels. I’m an Interior Designer and want to implement this design in a room.
I would reach out to a local carpenter, search on Thumbtack, etc.